CloudshinePro

Tag: cashbacktobackbuyflow

  • Order to Cash Back to Back Buy Flow – Step 3: Receiving PO

    This Blog is the continuation of the Back to Back Buy Flow.

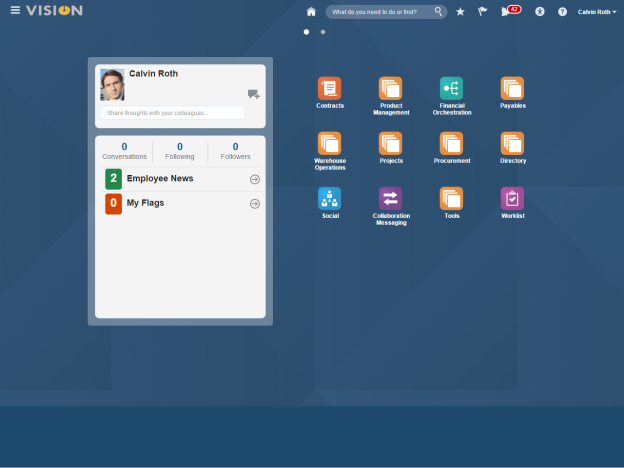
    As a Buyer, I have the same intuitive Home page with quick access to the tasks that I perform.

    [Click: Procurement]
    2016-04-19_16-35-12.png

    Click: Purchasing

    2016-04-19_16-35-27.png

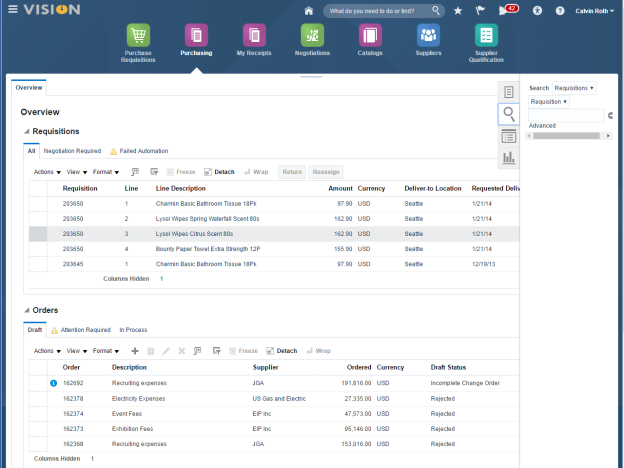
    I have easy access to Requisitions and Purchase Order.Searching is made simple.

    [Click: Search Drop Down]
    2016-04-19_16-36-18.png

    Select: Orders

    2016-04-19_16-36-32.png

    Since I know the order number that I am searching, I can enter it directly.

    [Enter: Purchase Order Number for the Configured Product Supply Order.]

    2016-04-19_16-36-50.png

    [Click: Collapse General]

    2016-04-19_16-37-16.png

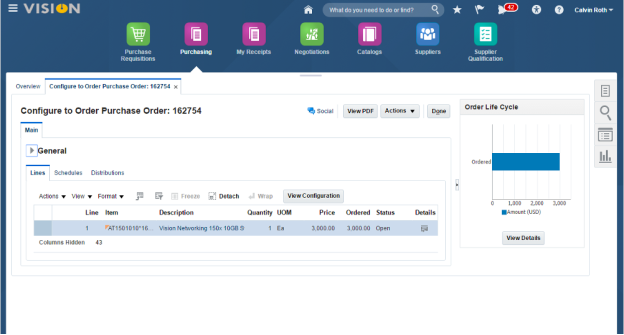
    The item ordered in this case is a configuration and viewing these details can be done in just a click.

    [Click: View Configuration]
    A screenshot of a cell phone Description automatically generated

    The complete configuration is passed from the Sales Order to the Purchase Order for the Supplier.The Uplink Module has an additional purchase cost of $300.This option added $400 to the sales price, so we are in line with our planned margins.

    [Sign on as the Warehouse Operator, Peter Wilson]

    2016-04-19_16-38-04.png

    End to End Order to Cash

    1. Automated Order Fulfillment
    2. Easy Picking and Shipping

    The purchase is sent electronically to the supplier for fulfillment.Changing roles to the warehouse operator, I will create the receipt for the products shipped from the supplier into the warehouse.

    Following the receipt, I can ship the products to the customer.

    [Sign In User: peter.wilson/weekly password]

    I’m Peter Wilson, a Warehouse Operator in the Chicago Distribution Center.In the warehouse, we need to get products in and out of inventory with a system that is easy to use, eliminates errors and ensures accurate inventory.One of my tasks is to receive goods when they are delivered.The springboard makes it easy for me to access the system to perform all of my routine tasks.

    [Click: Receipts]

    2016-04-19_16-38-58.png

    My expected receipts are displayed. This makes it easy for me to enter receipts without searching.

    [Click: Expected Shipment Lines for Midtown Computer Supplies]

    %The number of receipts may vary, depending on others using the same environments and other demo flows that you might have staged.

    2016-04-19_16-39-20.png

    Receipt of goods is done in just a couple of clicks.

    [Click: Row/s for the Purchase Orders pegged to your Sales Order]

    2016-04-19_16-39-46.png

    Receiving multiple items in a single transaction streamlines the process.

    [Click: Receive]

    2016-04-19_16-40-28.png

    The item information is defaulted.Only a couple of fields are required.

    [Enter: Quantity from the Sales Order]

    %You may also choose to Click: Show Receipt Quantity.

    2016-04-19_16-40-45.png

    [Click: Subinventory

    2016-04-19_16-41-03.png

    I identify the put away location.

    [Select: Subinventory, Stores]

    2016-04-19_16-41-27.png

    I repeat for the second item.

    [Enter: Quantity]

    2016-04-19_16-41-43.png

    [Select: Subinventory, Stores]

    I’m ready to create the receipt.

    [Click: Create Receipt]

    2016-04-19_16-42-18.png

    Flexible options allow me to record any specific receipt information.

    [Click: Submit]

    2016-04-19_16-42-44.png

    Receipt confirmation is given and I am done!

    [Click: OK]

    2016-04-19_16-43-26.png

    Another task I perform in the warehouse is shipments.

    [Click: Home]

    2016-04-19_16-43-37.png


    The Next Blog will cover the Picking and Shipping steps of the Back to Back Process.


  • Order to Cash Back to Back Buy Flow – Step 4: Picking and Shipping

    This Blog is the continuation of the Back to Back Buy Flow. This step is to cover the PIckwave process to complete Picking and Shipping.

    PIckwave Process


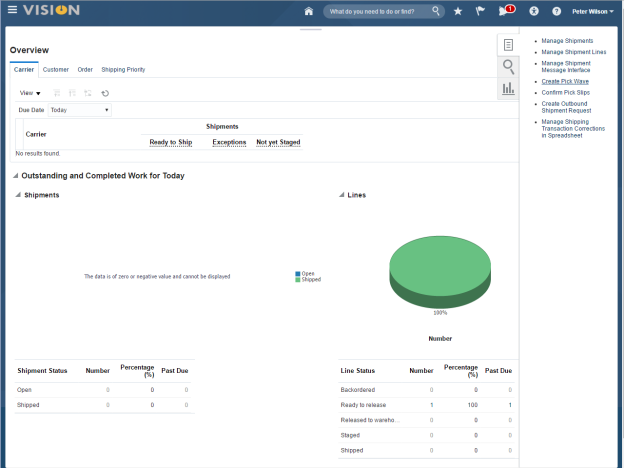
    I can navigate easily from the springboard.

    [Click: Shipments]


    2016-04-19_16-45-39.png


    [Click: Task List]


    2016-04-19_16-48-41.png


    Routine tasks are simple to access.

    [Click: Create Pick Wave]


    2016-04-19_16-49-05.png


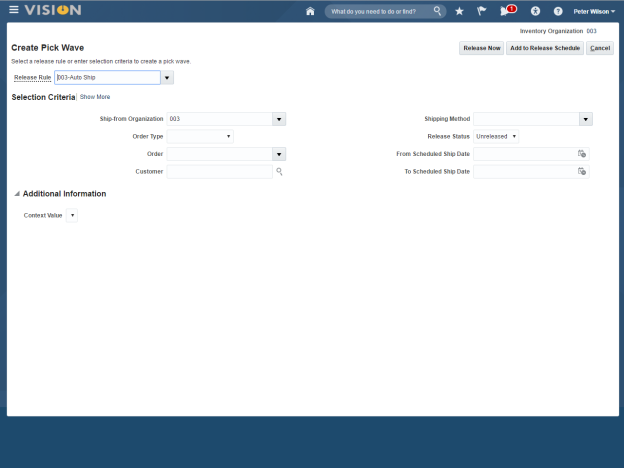
    Release Rules allow flexible management of the warehouse operations and the steps we want to execute during the shipping process.


    [Click: Release Rule]


    2016-04-19_16-49-29.png


    This order is ready to go and I want to confirm the pick and shipment in a single step.

    [Select Release Rule: 003 Auto Ship]

    %  Choose the path suitable to the customer. This will alter the steps in the flow from those presented here.


    2016-04-19_16-49-41.png


    Selection criteria allows me to create picks that work the most efficiently for our business – picking by customer or shipping method, for example. 

    [Click: Order field]


    2016-04-19_16-49-54.png


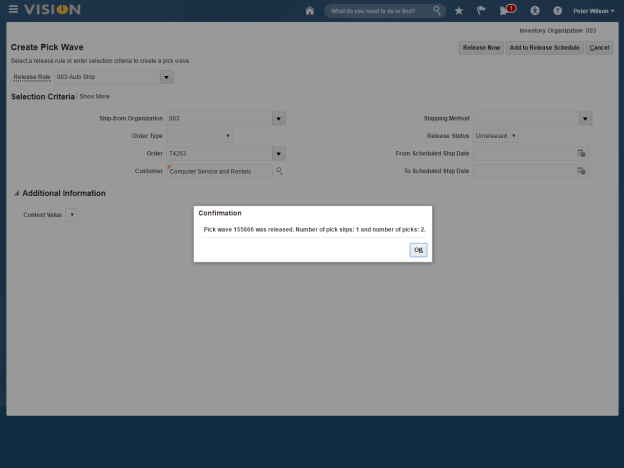
    [Enter: Order Number created earlier.]

    You can Pick and Ship with a single transaction, by selecting Release Rule 003 Auto Ship.  Or you can choose to Manually Confirm Pick and Ship Confirm by selecting 003 Man Pick Confirm.  Navigation will vary from those in this flow if you select these options.


    2016-04-19_16-50-14.png


    Since we are processing a single order, the customer name populates.  And I complete the transaction.

    [Click: Release Now]


    2016-04-19_16-50-25.png


    The picks are confirmed and I am finished with this task.

    [Click: OK]


    2016-04-19_16-50-40.png


    I’ve completed my role as the Warehouse Operator and I’ll change roles now, returning to Order Management as the Sales Specialist to view the customer order.


    2016-04-19_16-51-06.png


    The Next blog will cover the Invoicing process for the Back to Back flow.


  • Order to Cash Back to Back Buy Flow – Step 2: PO Generation

    Order to Cash Back to Back Buy Flow – Step 2: PO Generation


    This Blog is the continuation of the Back to Back Buy Flow. (Step 1 Link – Sales Order Creation)


    Progressing the Back to Back Buy flow order.


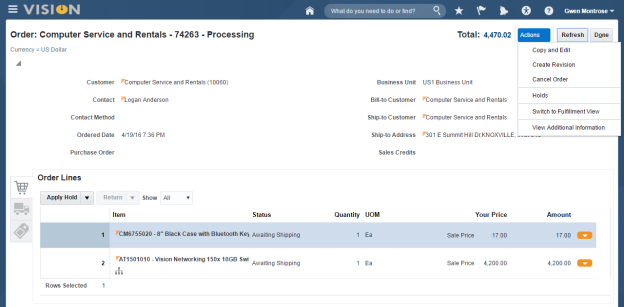
    The order has gone to Awaiting Shipping and I can quickly view the fulfillment information.

    [Click: Actions]

    %  The Status of the lines will depend on the progress of the orchestration.  You may receive Scheduled status prior to Awaiting Shipping.


    [Click: Switch to Fulfillment View]


    Order line status is also updated as the order processes. 

    [Click: Fulfillment Lines Tab]


    I have complete visibility on every item ordered.

    [Click: Supply Details Tab]


    I can see that this item will be fulfilled from our Chicago Warehouse. 

    [Scroll: Down to Attributes]


    And there is a Supply Order associated that is in a Status, Awaiting Supply.  The Supply Order in this case is a purchase from our contracted supplier.

    [Click: Supply Order Number]


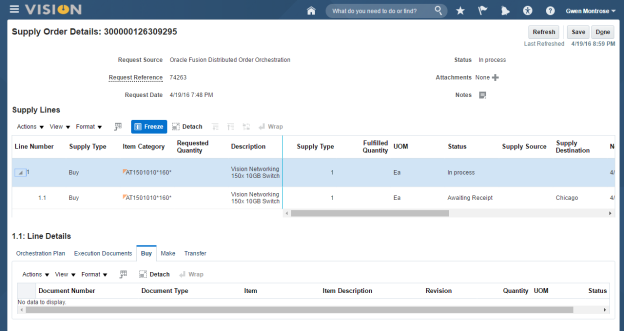
    The Supply Order to buy the product has been generated and pegged to the Sales Order and is Awaiting Receipt.   At ever stage of the fulfillment, I have complete visibility, including the associated execution documents.

    [Click: Supply Lines Sub Line]

    %  The Line Details tab exposed maybe different.  If Buy tab is not in focus, Click: Buy.

    %  The Status of the Supply will depend on processing time.  If this is ‘In Purchasing’ the PO has not yet been generated.


    The purchase order was generated automatically, based on our sourcing rules. 

    I can confirm the second item supply source in the same way.

    [Click: Done]

    %  Take note of the Purchase Order number.  You may want to use this when receiving the PO.


    [Click: Second Line]


    [Scroll Down to Attributes]


    The Supply Order associated with this item is also Awaiting Supply.  The Supply Order in this case is a purchase from our contracted supplier.

    [Click: Supply Order Number]


    The dynamic item number confirms that this item is a configured product, with customer selected options.

    [Click: Sub Line]


    The Purchase Order has been sent and the item is Awaiting Receipt from the Supplier.

    [Click: Orchestration Plan]

    %  Take note of the Purchase Order number.  You may want to use this when receiving the PO.


    The orchestration plan provides visual progress of the tasks related to the order.  We have complete control over the fulfillment and at a glance I can understand the stage of fulfillment.  A Reservation has automatically be placed on the expected receipt from the supplier.

    [Click: Done]


    The order is Awaiting Shipping.  I have full visibility of the fulfillment, just as I have for the Supply Order.

    [Scroll: Right]


    [Click: Orchestration Process Number]

    %  This is an optional step.  Included to emphasize the end to end visibility in the end to end process.


    Just as the Supply Order orchestration provides me detailed visibility of the task, the Order Orchestration provides visualizations of the tasks and progress for the order.  The Supply Request was sent to the Supplier and the order is Awaiting Shipping.

    [Click: Done]

    %  If showing configured product, you may want to assume the role of the Buyer demonstrate that the configuration is passed to the purchase order and with component level pricing. Or go directly to the role of the Warehouse to receive the items on the Purchase Order.


    The purchase is sent electronically to the supplier for fulfillment.  Changing roles to the Buyer, I can review the detailed configuration that came from the Sales Order.

    [Sign Out or Open a different Browser session to take the role of the Buyer to view the Purchase Order for the configured product.]


    In Next Blog the remaining process execution of the Order to Cash Back to Back Buy flow will be continued.


  • Order to Cash Back to Back Buy Flow – Step 1: Order Creation

    Order to Cash Back to Back Buy Flow – Step 1: Order Creation

    End to end Order to Cash is a critical process to stay competitive.We need a modern, highly automated and integrated process with efficient fulfillment and revenue recognition.

    In today’s customer centric market, the flexibility to respond to demand is critical.  We need a system that automates fulfillment regardless of the supply source with visibility throughout the fulfillment cycle.  Seamless processing and tracking is important to ensure accurate customer shipments.

    This Blog will provide the demonstration by capturing a customer order, Scheduling the Order, and Initiation of Purchase Order.

    As an order entry specialist, rapid order entry and automated fulfillment allow me to better service my customers.

    I’m Gwen, an order entry specialist. Rapid order entry, search and order status visibility  is essential for effective interaction and to retain our customers.

    With Order Management Cloud, I can access all of my information quickly from my tablet or computer. The springboard icons make it easy for me to access information and transactions that I routinely perform.

    [Click: Order Management]

    The Order Management Overview page embedded analytics dashboard which helps direct me to any critical actions I may need to take. Creating Orders is one click away.

    [Click: Create Order]

    Creating an order for Computer Service and Rentals.

    [Enter Customer Name: Com]

    Type ahead search, allows me to easily find and select the customer.

    [Select Customer: Computer Service and Rentals]

    Once selected, all other Order Header fields are dynamically populated; allowing me to quickly confirm the Customer Contact and Address and begin entering the desired products.

    [Click: Select Item]

    If I know the product number, I can simply enter it.
    [Select Item: CM6755020 or CM6755021]

    [Click: Enter]

    ♦ Configured and standard items have been defined for back to back buy processing.  For configured product, you will be prompted to select the desired options.  The configuration will carry forward to the purchase order.

    Adding items to the order is fast and provides immediate visibility of availability and pricing. We have an active agreement with a local supplier for fulfillment for cases, as this is a cost effective way to broaden our product offerings.  Our business process is to bring the cases in house before shipping it to the customer.

    [Update Quantity if desired.]

    [Click: Add]

    To communicate expected delivery date to the supplier, I update Shipping information.

    [Click: Truck Icon]

    Changing the requested date can be done easily using the calendar.

    [Click: Calendar icon]

    With a click, I can move the requested date to the next day.  This should allow time for our supplier to get the item to us where we can repackage and send to the customer.

    [Click: Tomorrow’s Date]

    [Click: OK]

    When I capture and order, I don’t need to specify the source for fulfillment.  The system uses Sourcing Rules and real-time Global Oder Promising to determine the best source of supply based on our rules.

    [Click: Estimate Order Availability]

    Available status is On Time!  The customer also requires another of our products.

    [Click: Shopping Basket Icon]

    I can search or enter the next item.

    [Enter Item: AT1501010]

    [Click: Enter]

    %  Configured and standard items have been defined for back to back buy processing.  For configured product, you will be prompted to select the desired options.  The configuration will carry forward to the purchase order.

    [Click: Enter]

    This product has options that the customer can choose.

    [Click: Configure and Add]

    Customer pricing is driven by selected options.  I can see that with a 12 Port selection, the customer price will be reduced by $600.00.

    [Click: Ethernet Option of choice]

    %  Depending on your selection the other options may be dynamically included or excluded.  This could vary the actual results of the following screen shots.

    The constraint based configurations engine dynamically updates related options when I choose the first option.

    [Click: Uplink Module of choice]

    %  The yellow triangle icon indicates automatic exclusion.  The blue star icon indicates automatic selection.

    %  Choosing an option that has an up charge will allow you to show component level pricing on the pegged purchase order.

    This customer wants the enhanced Uplink, adding $400.00 to the base price.   Option selections can reduce or add to the base price.

    [Click: Housing Color of choice]

    With all options selected, I am ready to add the item to the order.

    [Click: Finish]

    %  Optionally, you can review the configuration, using Finish and Review.  And add the item to order from that page.

    That completes the customer requests and I can send this order for fulfillment.

    [Click: Submit]

    [Click: Yes]

    As the Sales Specialist,  I have continuous updates to the Status of the order as it progresses.

    [Click: Refresh]

    %  Each of the items in the script have Blanket Purpose Orders and Sourcing Rules to automate the Supply Order.

    %  Release Planning Recommendations must complete before going to the next steps.  The Supply Order generated (Purchase Requisition and Purchase Order) can take a few moments to update on the Sales Order.  Watch for the Status to update to Awaiting Shipping.

    In Next Blog the remaining process execution of the Order to Cash Back to Back Buy flow will be continued. – SO Processing and PO Generation